Protect Your Columbus Home with the Best Sealant for Chimney Flashing
Choosing the Best Sealant for Chimney Flashing
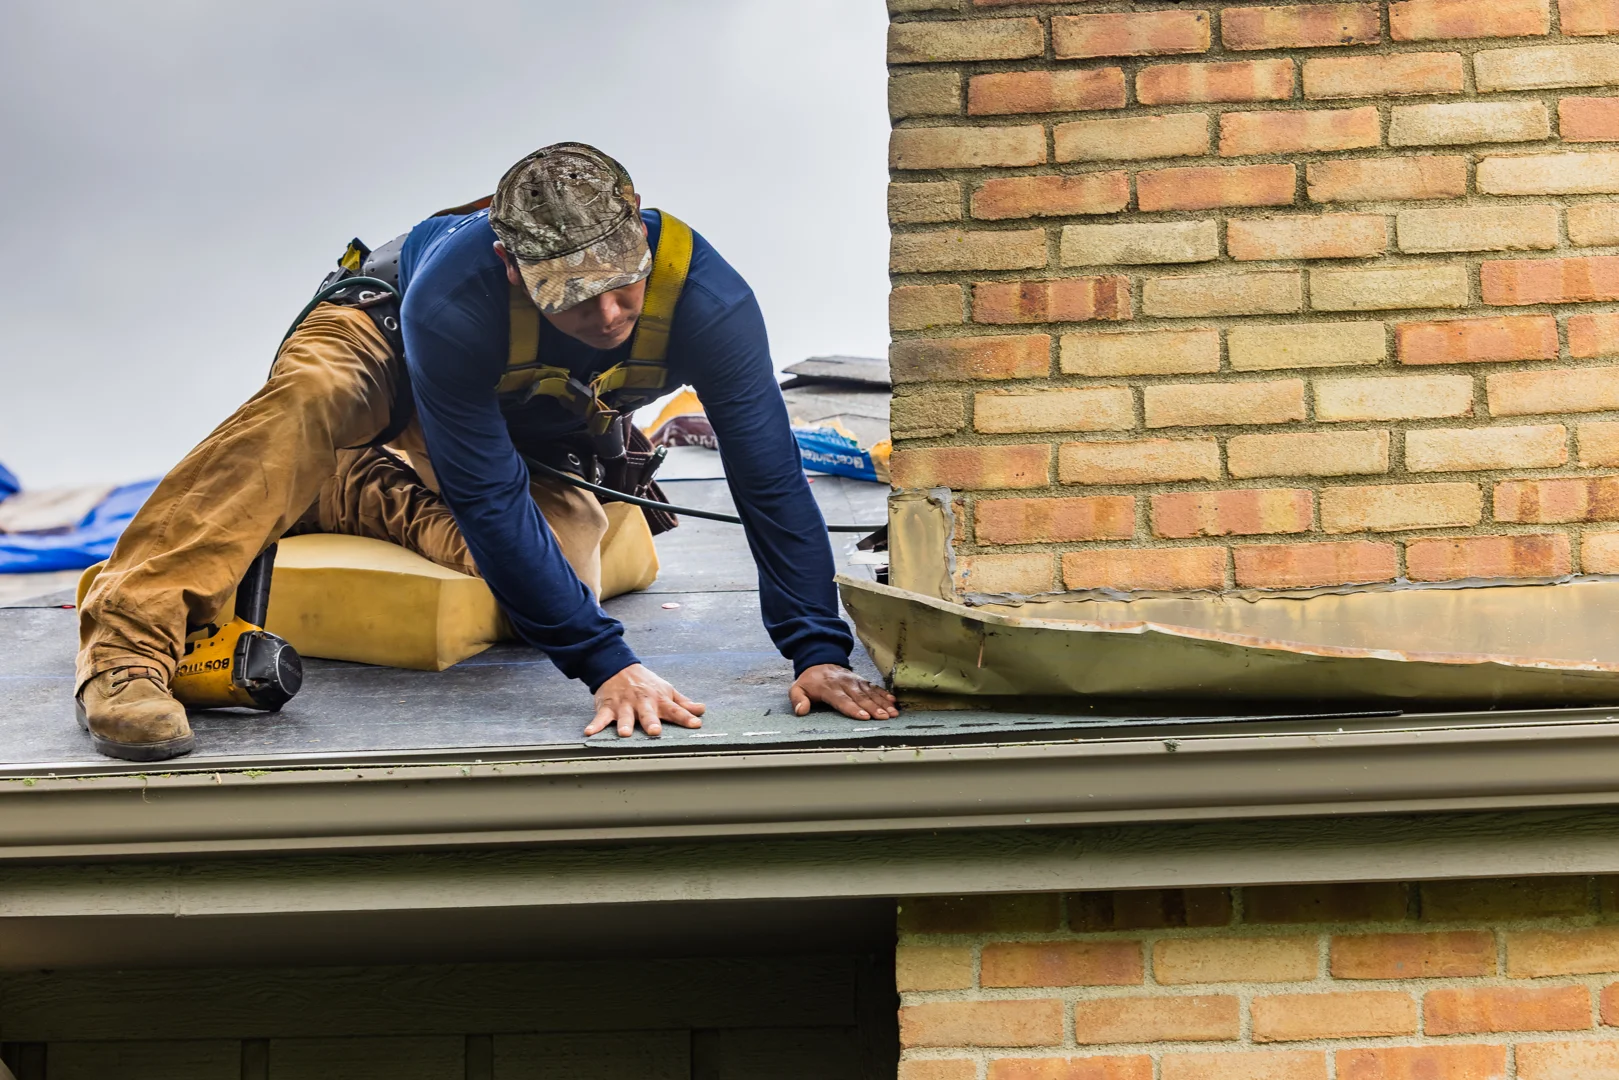
The best sealant for chimney flashing depends on where the leak starts. Use a roof-rated polyurethane caulk for a sound counter-flashing joint where metal meets brick. For a wider, intact area at the chimney base, a brush-on elastomeric flashing coating may be a better fit. Neither product can repair rusted, loose, or poorly installed flashing.
In Columbus, summer heat and winter freeze-thaw cycles can open small gaps around a chimney. Finding the cause matters more than covering the leak with another layer of sealant.
JF Baker Roofing has served Central Ohio since 1929. Led by third-generation owners Chad and Pat Baker, we handle residential and commercial roofing, roof repair and replacement, storm damage roofing, gutter installation and repair, and sheet metal work. We serve Columbus, Dublin, Upper Arlington, Hilliard, Grandview Heights, Worthington, and Westerville with honest assessments, transparent pricing, and no high-pressure sales tactics. We are a CertainTeed ShingleMaster Preferred Contractor, an NRCA member, and a BBB Accredited Business with an A+ rating.
I’m Chad M. Baker, and I’ll help you tell when sealant makes sense and when the flashing needs more than a patch.
Best sealant for chimney flashing terms to remember:
Choosing the Best Sealant for Chimney Flashing: Chemistries Compared
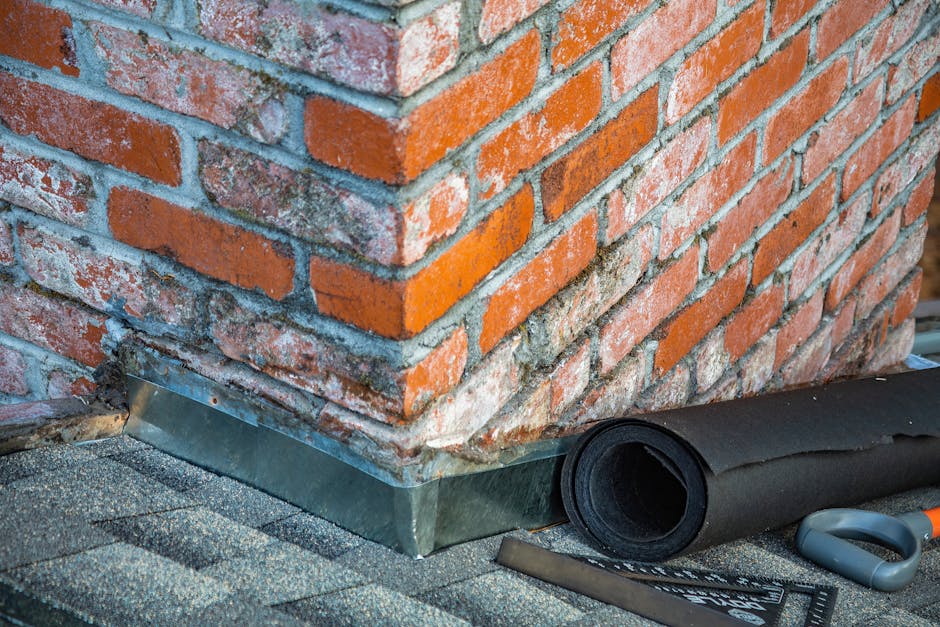
When water finds its way inside around your fireplace stack, reaching for the nearest tube of hardware store caulk is tempting. However, chimneys are among the most demanding environments on your roof. A chimney combines two completely different materials: porous, rigid masonry (brick, stone, or block) and flexible roofing metal (aluminum, galvanized steel, or copper).
As seasonal temperatures swing from below zero in January to over ninety degrees in July, the metal and brick expand and contract at different rates. If a sealant lacks the chemistry to stretch, recover, and bond tenaciously to both substrates simultaneously, the seal tears open. Selecting the right product requires matching chemistry to your specific flashing setup. Understanding proper caulking for flashing and consulting our metal flashing sealant guide will help you make an informed choice.
Top Polyurethane Formulations: The Contractor Standard for the Best Sealant for Chimney Flashing
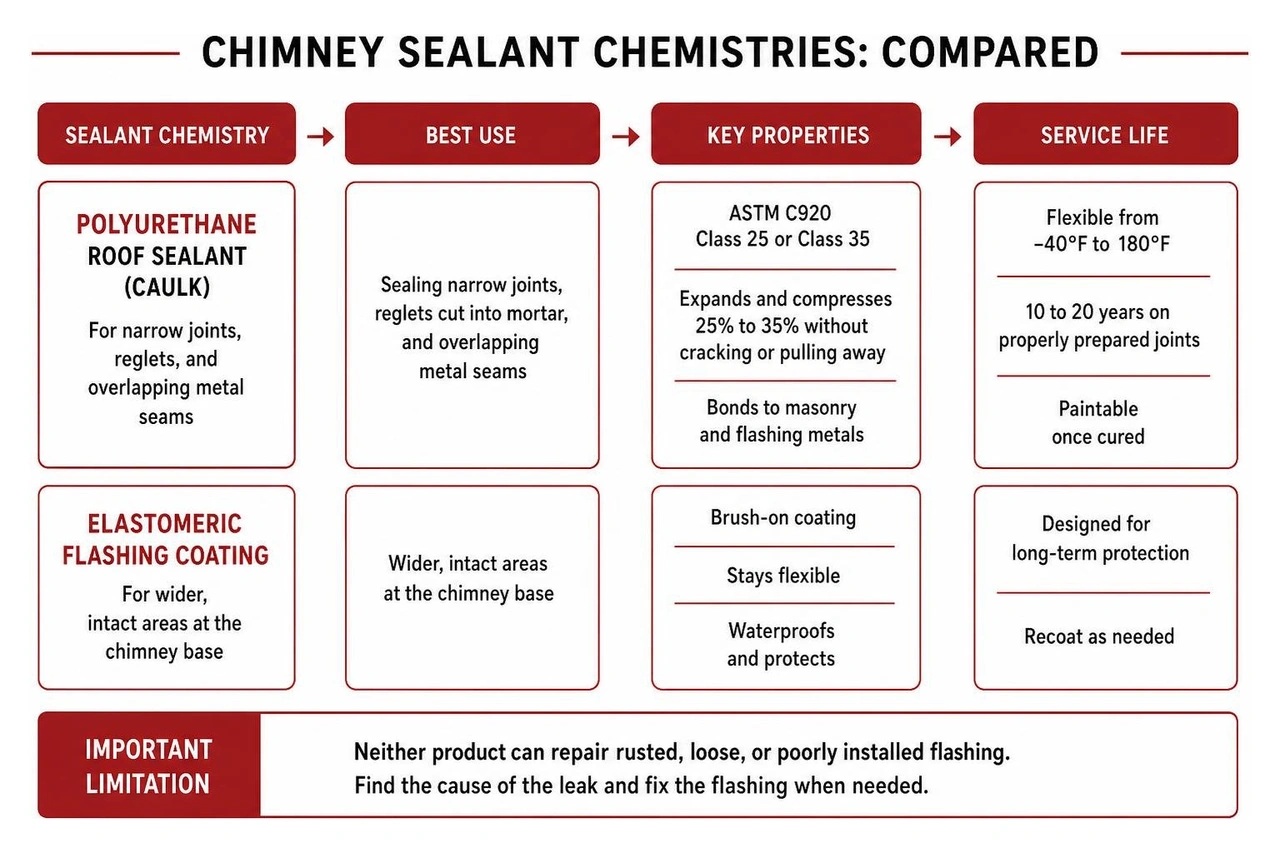
For sealing narrow joints, reglets cut into mortar, and overlapping metal seams, polyurethane is widely recognized as the industry workhorse. Premium polyurethane sealants meet ASTM C920 Class 25 or Class 35 standards, meaning they can expand and compress by 25% to 35% of the joint width without cracking or pulling away from the brick.
Polyurethane creates a true structural bond with porous masonry and flashing metals. Products engineered for exterior roof interfaces, such as those detailed in our guide to polyurethane roof sealant performance, cure into a tough, rubbery bead that resists ozone, UV radiation, and physical abrasion. According to the technical specifications of Loctite PL Roof and Flashing Polyurethane, these high-performance formulations remain flexible in temperatures ranging from -40°F up to 180°F. They provide a service life of 10 to 20 years on properly prepared joints and are fully paintable once cured.
Brush-On Elastomeric Coatings: The Best Sealant for Chimney Flashing Base Repairs
When you need to waterproof broader transitions or repair existing flashing surfaces that remain structurally solid, a brush-on elastomeric coating is often the best choice. Instead of extruding a narrow bead from a cartridge, elastomeric coatings are thick, spreadable liquid compounds that cure into a continuous, seamless rubber membrane.
These products are specifically formulated to span the junction where step flashing meets chimney brick or where base flashing ties into roofing shingles. For example, Chimney RX Elastomeric Flashing Sealant data shows that brush-applied elastomeric membranes permanently bridge dynamic micro-fissures while providing complete UV stability. Similarly, MasonryDefender Chimney Flashing Sealer covers up to 14 square feet per half-gallon container, creating a clean black finish that visually blends into dark shingles while accommodating structural shifting.
Butyl Rubber and SBS-Modified Adhesives
Butyl rubber sealants and SBS-modified (styrene-butadiene-styrene) bituminous caulks serve specific niches in roof flashing systems. Butyl remains exceptionally flexible over its 5 to 15 year lifespan, making it an excellent choice for hidden metal-to-metal lap joints where pieces of step flashing slide past one another.
SBS-modified adhesives provide immediate water resistance. Looking at CertainTeed FlintBond Caulk product specifications, these specialized adhesives can adhere in wet conditions and withstand high surface temperatures. However, because asphaltic and butyl compounds can soften or dry out when exposed directly to intense sunlight over long periods, they are best utilized behind the metal or along concealed seams rather than as an exposed counter-flashing top bead.
Why Standard Silicone Fails on Chimneys
One of the most frequent DIY mistakes we encounter across Central Ohio roofs is the use of standard 100% silicone caulk on chimney flashing. While silicone performs well on glass windows and kitchen tiles, it performs poorly on asphalt shingle roofs and chimney masonry.
Silicone struggles to form a permanent bond with porous, dusty brick surfaces and oily asphalt shingles. Over an 18 to 36 month window, UV exposure and thermal movement cause standard silicone beads to peel away in long, useless ribbons. Furthermore, standard silicone cannot be painted, meaning you cannot color-match it to your chimney trim, and new sealants will never stick to a surface contaminated with silicone residue. Reviewing the silicone roof flashing sealant risks shows why professional roofers avoid relying on silicone for chimney-to-roof transitions.
Cartridge Caulk vs. Brush-On Sealant: Matching Product to Joint Location
A complete chimney flashing installation is not a single piece of sheet metal. It is a 4-piece overlapping system consisting of apron flashing at the downhill front, step flashing along the sides woven between shingle courses, a cricket or backer flashing on the uphill side, and counter flashing (cap flashing) embedded directly into the brickwork.
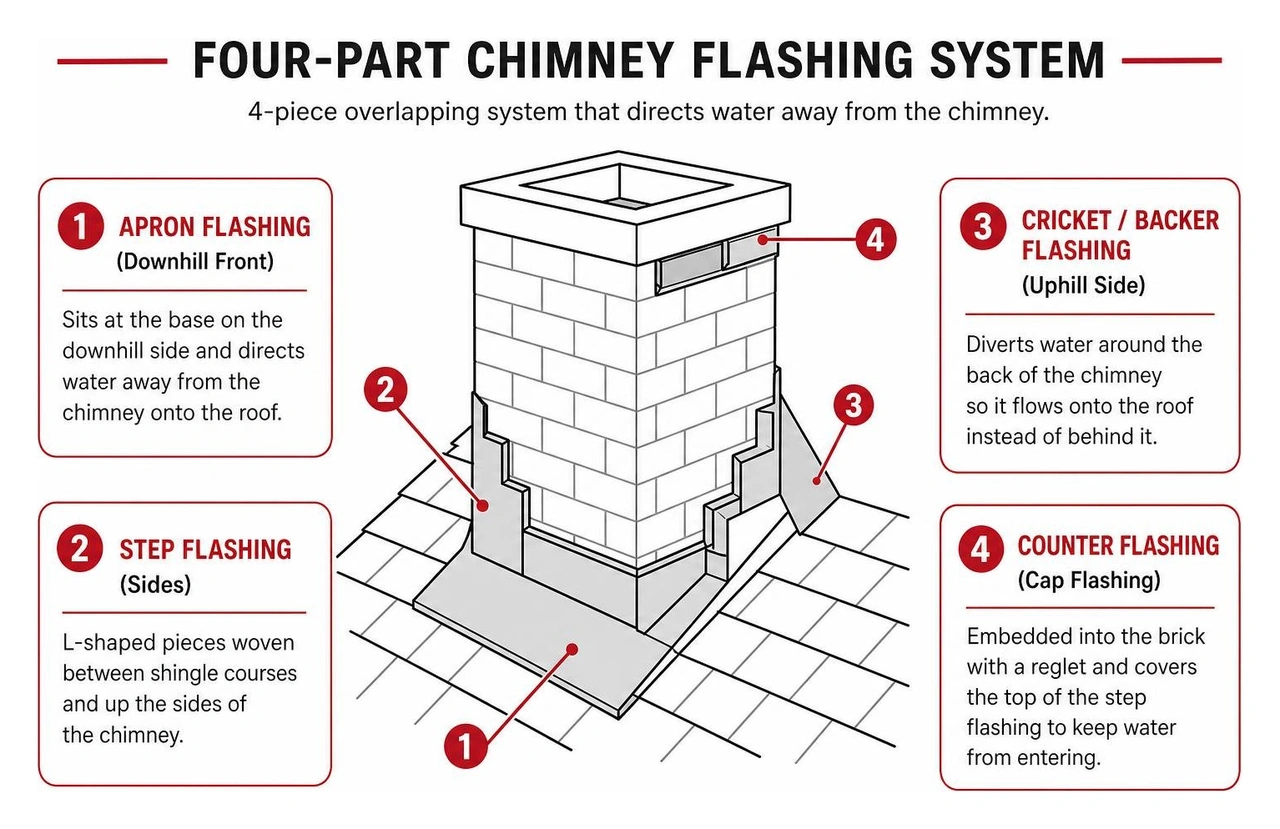
Because each part of the chimney handles water differently, cartridge caulks and brush-on coatings must be applied to the specific joint types they were engineered to protect. You can explore our comprehensive flashing sealant guide to see how these materials work across various roof penetrations, or check out our overview of chimney leak fix techniques.
Sealing Counter Flashing Reglets and Mortar Joints
The counter flashing covers the top of the step flashing. It is secured to the masonry by cutting a horizontal groove (a reglet) approximately one inch deep into the mortar joint with a diamond blade, folding the top hem of the sheet metal into the groove, securing it with lead wedges, and filling the joint.
For reglet joints, a cartridge-applied polyurethane sealant is mandatory. A brush-on coating cannot provide the depth or compression resistance required inside a narrow mortar slot.
- The joint must be filled deeply, maintaining a proper width-to-depth ratio (ideally 2:1).
- For reglets deeper than half an inch, insert a closed-cell backer rod before caulking to ensure the sealant adheres only to the top and bottom of the joint, allowing free lateral movement.
Sealing Step Flashing and Chimney Base Transitions
The base transitions along the sides and back of the chimney experience heavy water runoff during rainstorms. Here, water runs down the roof valley or slope and hits the vertical brick wall.
Brush-on elastomeric membranes excel across these broad, irregular transitions. When sealing base areas:
- A brush-on coating allows you to seal over fastener heads, small hairline splits, and uneven shingle interfaces.
- For wider joints or minor hairline cracks between the flashing flange and masonry, embed a polyester reinforcement fabric directly between two coats of elastomeric sealant to create a durable composite waterproof barrier.
Step-by-Step Chimney Flashing Surface Prep and Application Process
Applying sealant over dirt, moss, or failing asphalt tar ensures premature failure. A sealant is only as good as the substrate beneath it. To ensure a tight, weather-resistant bond, follow this professional step-by-step process:
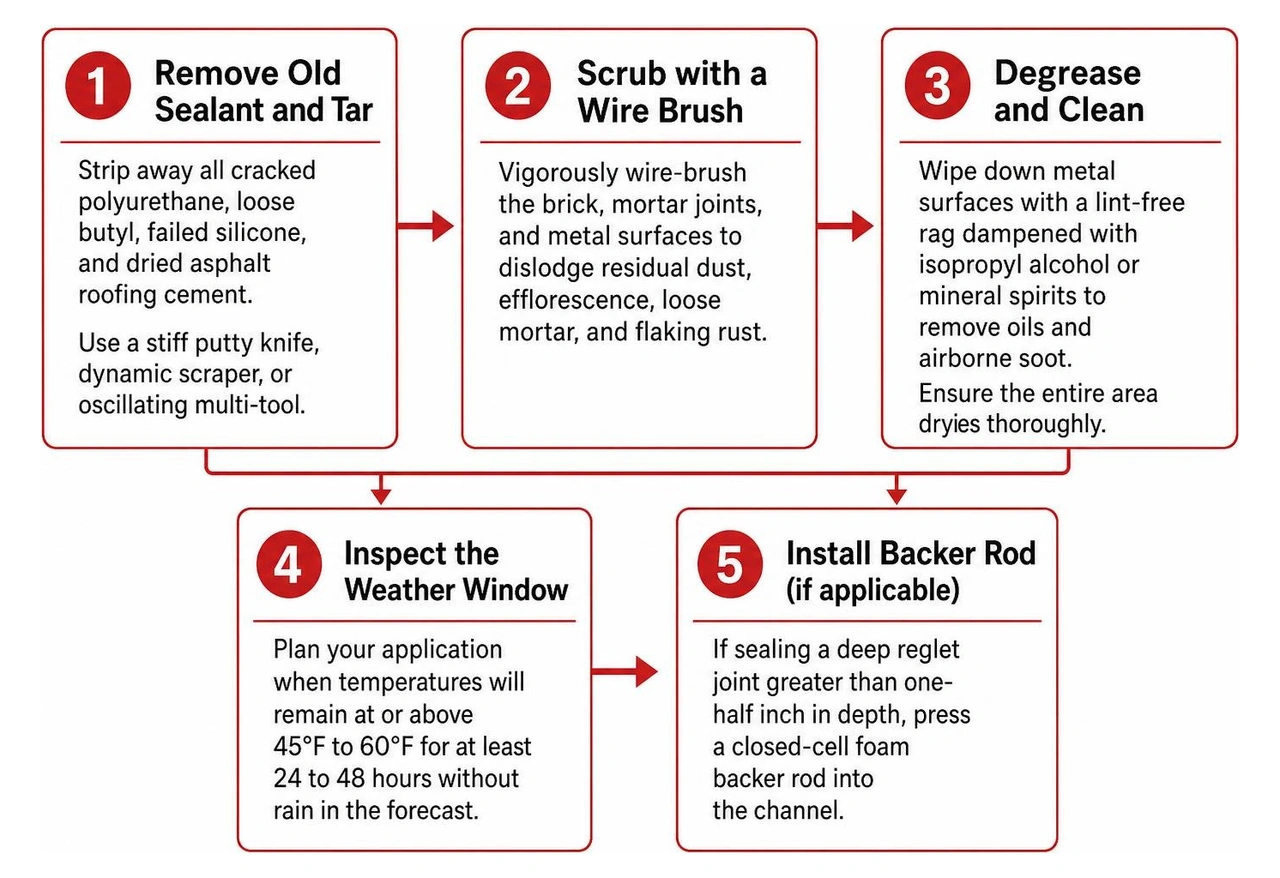
- Remove Old Sealant and Tar: Strip away all cracked polyurethane, loose butyl, failed silicone, and dried asphalt roofing cement. Use a stiff putty knife, dynamic scraper, or oscillating multi-tool.
- Scrub with a Wire Brush: Vigorously wire-brush the brick, mortar joints, and metal surfaces to dislodge residual dust, efflorescence, loose mortar, and flaking rust.
- Degrease and Clean: Wipe down metal surfaces with a lint-free rag dampened with isopropyl alcohol or mineral spirits to remove oils and airborne soot. Ensure the entire area dries thoroughly.
- Inspect the Weather Window: Plan your application when temperatures will remain at or above 45°F to 60°F for at least 24 to 48 hours without rain in the forecast.
- Install Backer Rod (if applicable): If sealing a deep reglet joint greater than one-half inch in depth, press a closed-cell foam backer rod into the channel.
- Apply Cartridge Polyurethane: Cut the nozzle at a 45-degree angle to match the joint width. Apply even, steady pressure on the caulk gun, pushing the sealant forward into the joint rather than pulling it across the surface.
- Tool the Bead: Within five minutes of extrusion, tool the bead smooth using a clean joint knife or gloved finger to force the sealant into full contact with both surfaces. Create a slight downward slope to shed water.
- Apply Brush-On Elastomeric (if sealing base/transitions): Brush on a 1/8-inch thick base coat extending at least one inch beyond the repair perimeter. If bridging seams, lay reinforcement fabric into the wet base coat, then apply a second topcoat to encapsulate it completely.
- Allow Full Cure: Protect the joint from foot traffic and heavy moisture while it skins over (typically 24 hours) and reaches functional cure over three to seven days. For detailed steps on tracking down hidden leak sources, refer to our walkthrough on chimney flashing leak repair steps.
Sealant Repair vs. Full Flashing Replacement: Cost and Longevity
While sealants provide an effective, economical solution for maintaining joints and stopping small leaks, they are not a substitute for structurally sound metal. Knowing whether your chimney needs a sealant tune-up or a complete metal tear-off will save you money and protect your home interior from water damage. For a broader overview of roof maintenance, see our complete roof flashing repair guide.
A sealant repair is ideal when:
- The sheet metal is completely free of rust, severe corrosion, and physical warping.
- The leak is isolated to aged, dried-out sealant pulling away inside the mortar reglet joint.
- The step flashing pieces beneath the shingles remain undisturbed, flat, and properly lapped.
A full flashing replacement is necessary when:
- Aluminum or galvanized steel flashing is rusted through, brittle, or heavily oxidized. Aluminum flashing typically lasts 15 to 20 years, whereas premium copper systems can endure for 50 to 100 years.
- Previous contractors covered the entire chimney base in thick layers of black asphalt mastic (roofing tar), hiding rotted roof decking and preventing proper water flow.
- The chimney is wider than 30 inches and lacks a cricket (a small peaked roof structure built behind the chimney). Building codes require a cricket on wide chimneys to divert runoff around the stack and prevent standing water.
Frequently Asked Questions About Chimney Flashing Sealants
Can chimney flashing sealant provide a permanent fix for roof leaks?
No sealant provides a truly permanent solution. High-performance polyurethane and elastomeric sealants offer a dependable service life of 10 to 20 years when properly applied to clean surfaces. However, sealants naturally age under thermal cycles and UV radiation. If the underlying metal flashing is rotted, detached, or installed improperly without step flashing, caulking acts only as a temporary patch until the sheet metal is correctly replaced.
How long does chimney flashing sealant take to cure completely?
Curing time depends on the specific sealant chemistry, ambient temperature, and humidity levels. Polyurethane sealants typically form an outer protective skin within 24 hours, achieve functional waterproofing strength in 3 days, and reach a full cure in approximately 7 days at 75°F and 50% relative humidity. Elastomeric brush-on coatings dry to the touch in 30 to 60 minutes and fully cure within 6 to 12 hours under dry conditions. Always ensure there is no rain in the forecast during application.
Are chimney flashing sealants paintable to match exterior trim?
Yes, most polyurethane sealants and acrylic elastomeric coatings are fully paintable using quality exterior latex paints once cured. This allows you to match your chimney cap, metal flashings, or siding colors seamlessly. In contrast, standard 100% silicone sealants are completely unpaintable; paint will bead up and flake off their slick surfaces immediately.
Conclusion
Protecting your chimney from water intrusion requires the right sealant applied with care. A well-placed polyurethane bead in a mortar reglet or an elastomeric coating over sound base flashing can keep your roof waterproof through harsh winter freezes and intense summer heat.
JF Baker Roofing has provided trusted service across Central Ohio since 1929. Led by third-generation owners Chad and Pat Baker, our family-owned business believes in honest assessments, transparent pricing, and no high-pressure sales tactics. We recommend repairs when a straightforward resealing will protect your home, and full replacements only when the sheet metal is genuinely compromised. We are a CertainTeed ShingleMaster Preferred Contractor, an NRCA member, and a BBB Accredited Business with an A+ rating, proudly serving Columbus, Dublin, Upper Arlington, Hilliard, Grandview Heights, Worthington, and Westerville.
Whether you need a simple joint inspection or a complete custom sheet metal reflash, explore our professional residential roofing and flashing solutions or contact our team today to schedule an evaluation. Let our reputation be your security.