Rubber Roof Patching Made Simple: EPDM Products That Actually Hold
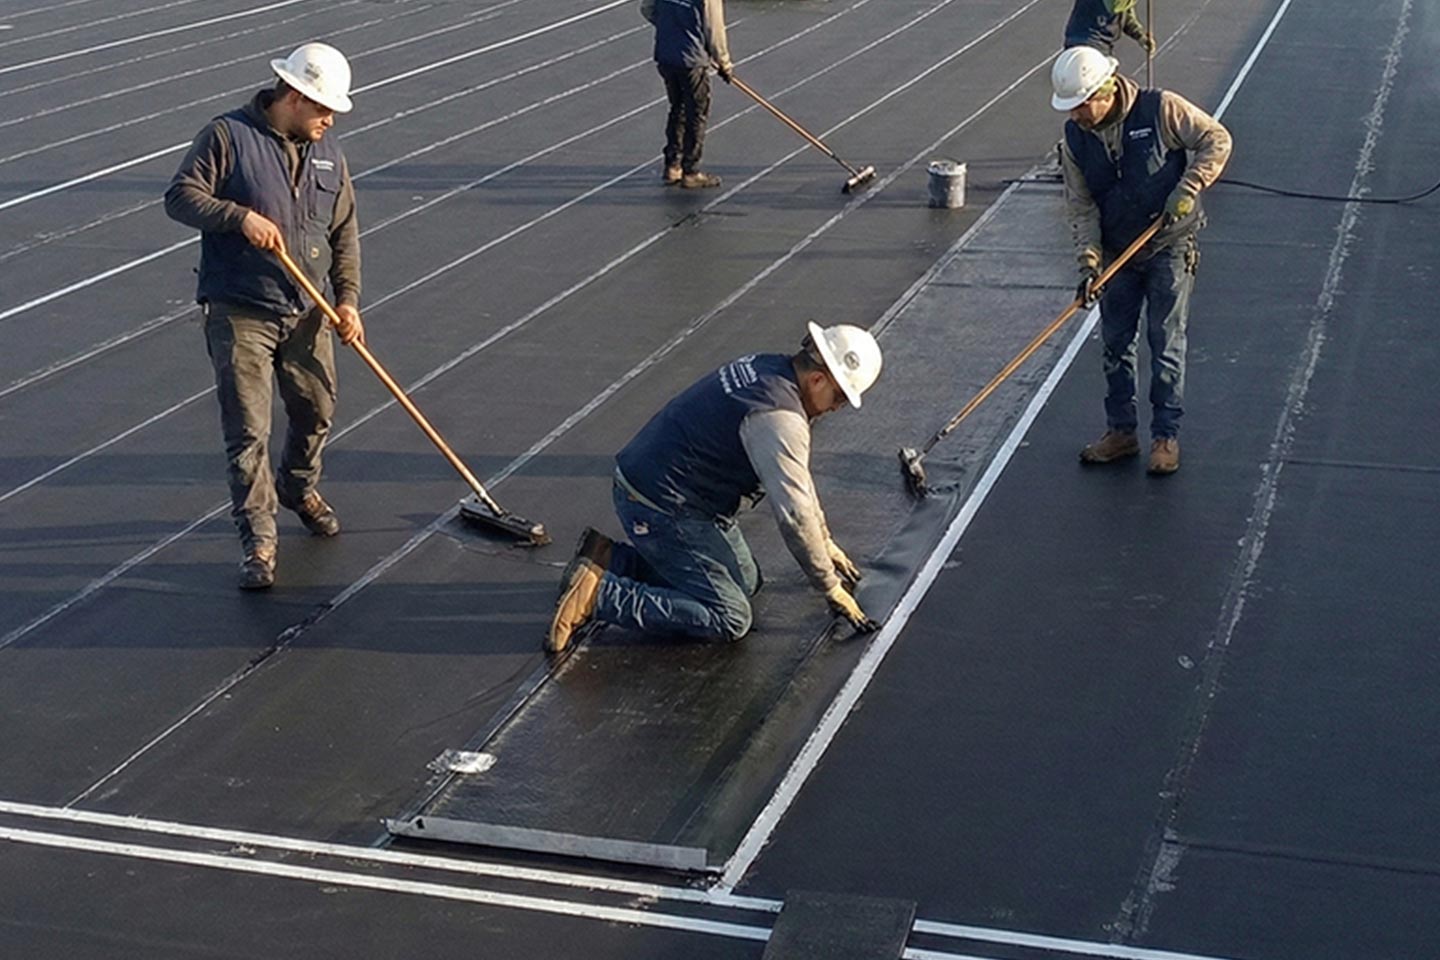
Choosing EPDM Patch Material That Holds
For a small puncture, choose EPDM patch material made for rubber roofing, such as a cured, self-adhering patch used with its compatible primer. Clean and dry the roof, cover the damage by at least 2 inches on every side, and press the patch firmly with a seam roller. Follow the kit's temperature and weather instructions.
A patch alone will not fix wet insulation, a soft roof deck, or a long, failing seam. If a leak on your Columbus-area roof keeps coming back, have the roof checked before covering the spot again.
I'm Chad M. Baker, a third-generation owner at JF Baker Roofing Company, which has served Central Ohio since 1929.
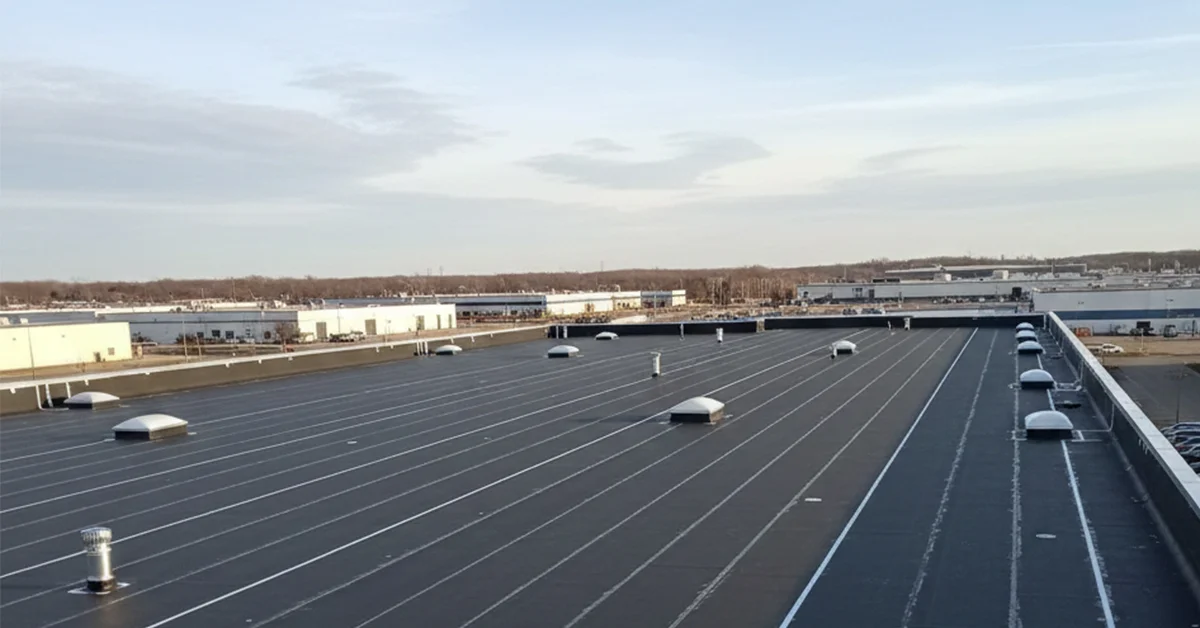
When water enters a flat roof, it rarely drips straight down into the room below. Moisture tends to track along timber boards, insulation joints, and metal fasteners before finding an opening in your ceiling. Identifying the true source of the leak on the exterior surface is always the first step toward a lasting repair. Applying the right patch restores the weather barrier, protects the underlying decking, and extends the service life of your low-slope system.
Membrane Identification and Choosing the Right EPDM Patch Material
Before you purchase any repair products, you must confirm the exact material protecting your roof. Using products designed for plastic or asphalt on a rubber membrane causes chemical reactions that destroy the water barrier.
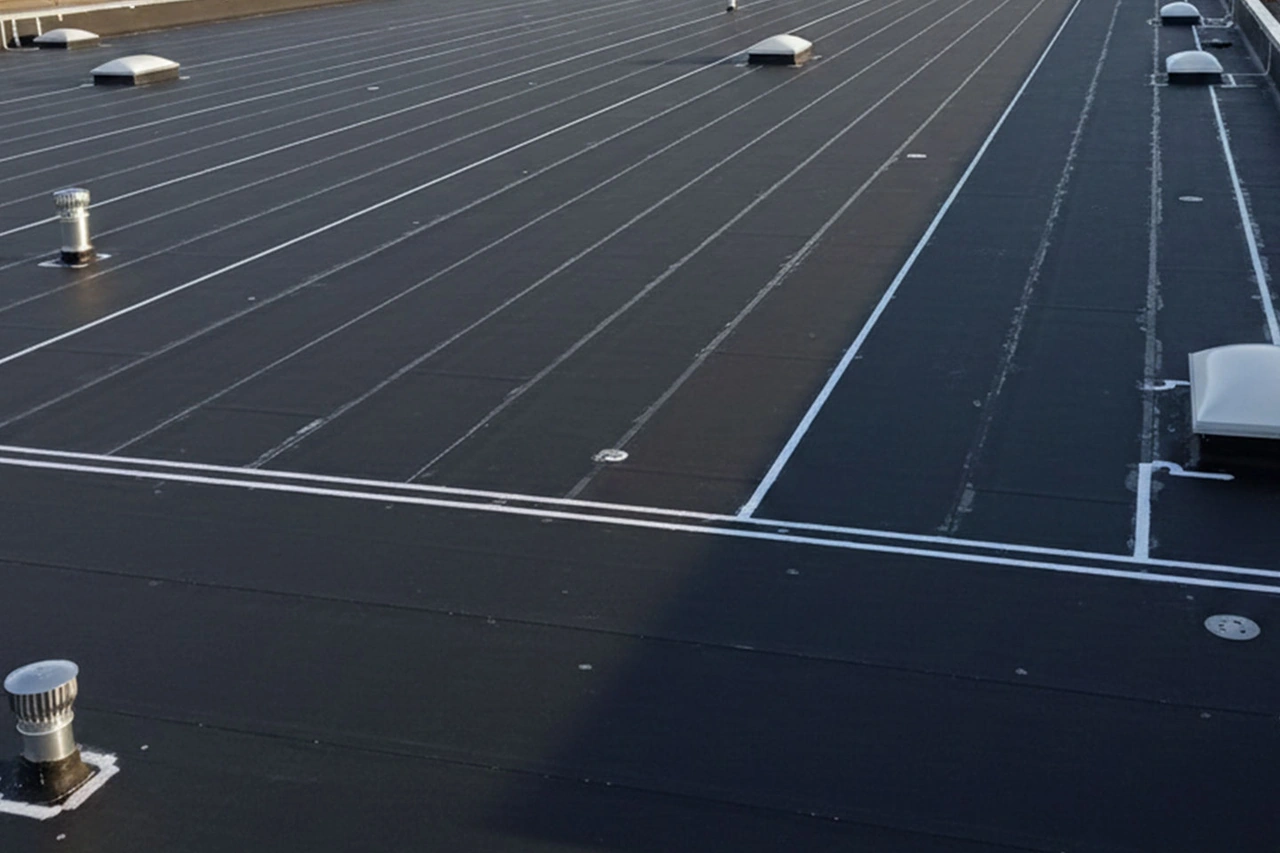
Single-ply rubber membranes perform exceptionally well under seasonal temperature swings. When properly installed and maintained, an EPDM roof can easily last 20 to 30 years. If you are unsure of your roof type, arranging a professional rubber roof inspection service helps identify the material and uncovers subtle weaknesses before severe weather hits.
Identifying EPDM Versus TPO, PVC, and Modified Bitumen
Single-ply and multi-ply flat roofs look similar from a distance, but their chemical compositions require completely different repair strategies.
- EPDM (Ethylene Propylene Diene Monomer): A synthetic rubber membrane, usually black or dark gray, with a smooth, slate-like feel. It is highly flexible and elastic. Seams are joined using black butyl tape or liquid adhesives rather than heat.
- TPO (Thermoplastic Polyolefin): A rigid, plastic-based single-ply membrane that is typically white, tan, or light gray. TPO seams are hot-air welded, melting the sheets together.
- PVC (Polyvinyl Chloride): Similar in appearance to TPO, PVC is a smooth, weldable thermoplastic sheet that feels slick and firm rather than rubbery.
- Modified Bitumen and Built-Up Roofing (BUR): Asphalt-based multi-ply systems. These roofs feature granular ceramic surfaces, smooth asphalt glazes, or embedded gravel, and feel stiff and abrasive.
To verify rubber, you can check an unbonded edge or overlap. EPDM stretches like an inner tube when pulled and returns to its original shape. Thermoplastics like TPO and PVC offer minimal stretch, while modified bitumen will crack or resist flexing entirely.
Selecting the Right EPDM Patch Material for Punctures and Seams
Once you confirm your roof is synthetic rubber, matching the patch type to the specific fault is critical. Standard manufactured EPDM membranes comply with ASTM D4637 standards, commonly sold in thicknesses of 45 mil, 60 mil, and 90 mil.
Different areas of the roof face varying levels of mechanical stress:
- Surface Punctures and Cuts: Caused by dropped tools, sharp tree branches, or rooftop foot traffic. These are best addressed using pre-cured peel-and-stick rubber patch disks.
- Separated Lap Seams: Caused by aged adhesives, building settlement, or thermal movement. Seams require laminated cover strip tape placed over the joint.
- Penetrations, Upstands, and Rooflight Curbs: Sharp corners and round pipe boots experience multidirectional movement. These irregular areas benefit from conformable uncured flashing tape or multi-layer liquid waterproofing systems.
Following a proven EPDM rubber roof installation guide ensures that any major modifications or flashing details integrate seamlessly into your existing membrane.
Comparing Cured Patches, Seam Tapes, and Liquid Repair Systems
Selecting the proper repair product depends on whether you are patching a flat, open field or sealing an intricate, uneven corner detail.
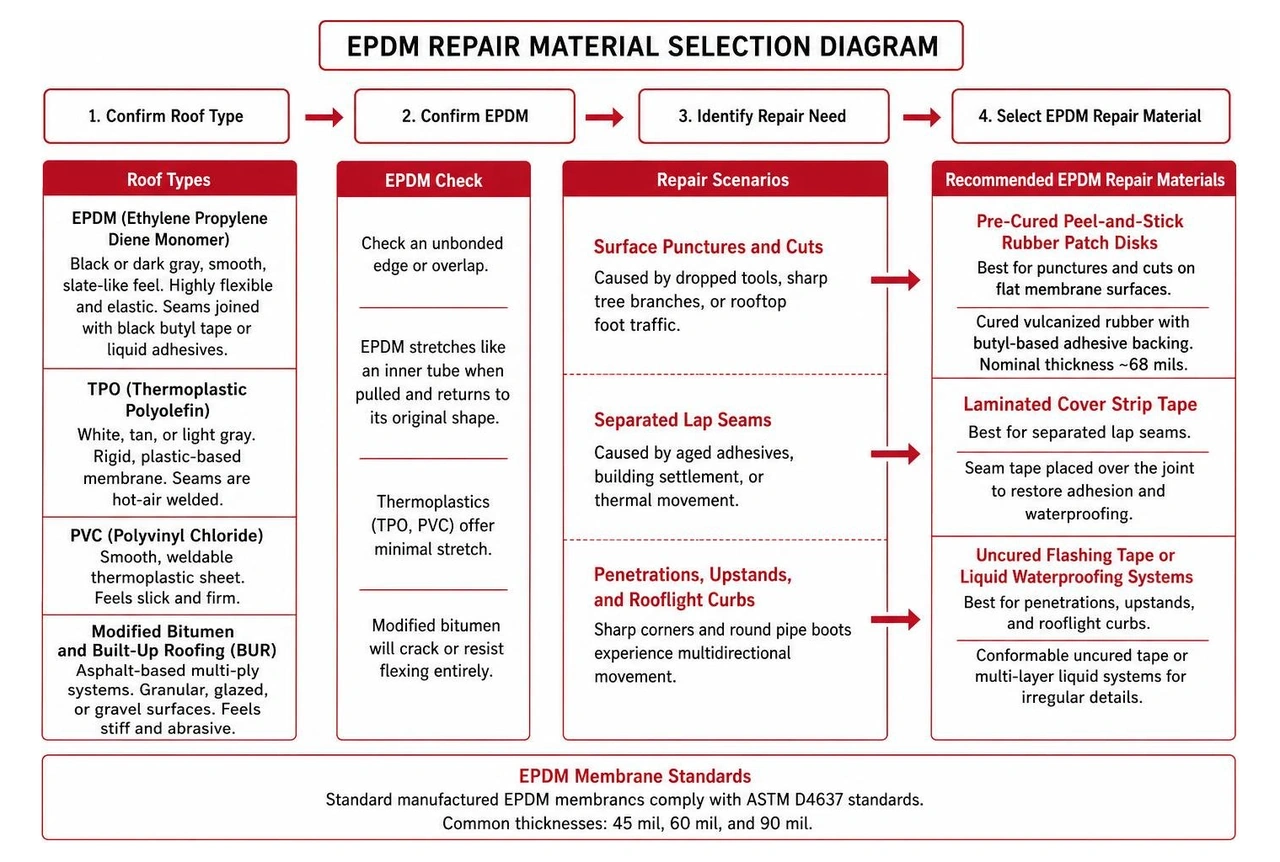
Standard commercial EPDM patch material is manufactured with a cured vulcanized rubber top layer laminated to a thick butyl-based adhesive backing, achieving a robust nominal thickness around 68 mils.
Pre-Formed Disks and Peel-and-Stick Cover Strips
For fast, durable fixes on flat membrane sections, pre-formed adhesive systems are the industry standard:
- Round Pre-Formed Disks: Typically 8.5 inches in diameter, or square patches measuring 5x5 inches and 6x9 inches. The rounded corners prevent wind and running water from catching and lifting the patch edges over time.
- Peel-and-Stick Cover Strips: Continuous rolls of 6-inch-wide laminated cured EPDM tape used to cover split seams or cracked membrane field laps.
- T-Joint Covers: Circular patches, usually 6 inches across, applied specifically over step-down intersections where two overlapping horizontal sheets cross a vertical seam.
Purchasing a comprehensive EPDM roof repair kit ensures you have the correct combination of laminated flashing, cover strips, and dedicated cleaning pads on hand.
Selecting Liquid EPDM Patch Material and Reinforced Scrim
For awkward profiles like structural upstands, metal gravel stops, and skylight curbs, peel-and-stick tapes can wrinkle or create small gaps called fishmouths. In these locations, a reinforced liquid-applied repair system provides a seamless alternative.
Liquid systems use a flexible basecoat, an embedded non-woven fabric reinforcement scrim, and a weather-resistant topcoat. According to detailed EPDM roof repair procedures, application rates require precision:
- Primer: Applied at 0.1 liters per square meter (10 square meters per liter) to clean, dry rubber.
- Basecoat: Applied at a minimum rate of 1.0 liter per square meter.
- Reinforcement Scrim: Embedded directly into the wet basecoat, with adjacent mesh sections overlapping by at least 50mm.
- Topcoat: Applied at 0.5 liters per square meter over the saturated mesh to encapsulate the repair.
Liquid repairs require up to 7 days for a complete chemical cure, during which regular foot traffic must be avoided.
Step-by-Step Application for Long-Lasting Rubber Roof Repairs
A patch will only last if you achieve a true chemical bond between the new material and the existing roof. EPDM produces a thin oxidized film and accumulates carbon soot over years of exposure. Sticking an adhesive patch directly over an unwashed membrane guarantees failure within months.
Understanding the best way to patch a roof comes down to meticulous surface preparation, proper primer activation, and thorough mechanical pressure.
Proper Surface Preparation for EPDM Patch Material
- Clean the Area: Clear away all loose dirt, standing water, and organic growth using clean water and a stiff-bristle brush. Clean a boundary at least 6 inches wider than the patch dimensions.
- Strip the Surface Film: Apply a dedicated weathered membrane cleaner using an abrasive scrubbing pad. Scrub the surface vigorously until the rubber turns deep matte black and no oxidized residue remains. Wipe clean with a dry, lint-free cotton cloth.
- Apply Tape Primer: Pour or brush a specialized EPDM tape primer across the cleaned target area (1 pint generally covers approximately 25 square feet). Scrub the primer into the rubber pores using an abrasive pad.
- Test for Flash-Off: Wait for the primer solvents to evaporate. Test the surface by pressing a clean, dry knuckle or finger to the primed area. The primer must feel tacky to the touch without creating wet strings of adhesive on your skin.
Installing, Rolling, and Detailing the Patch
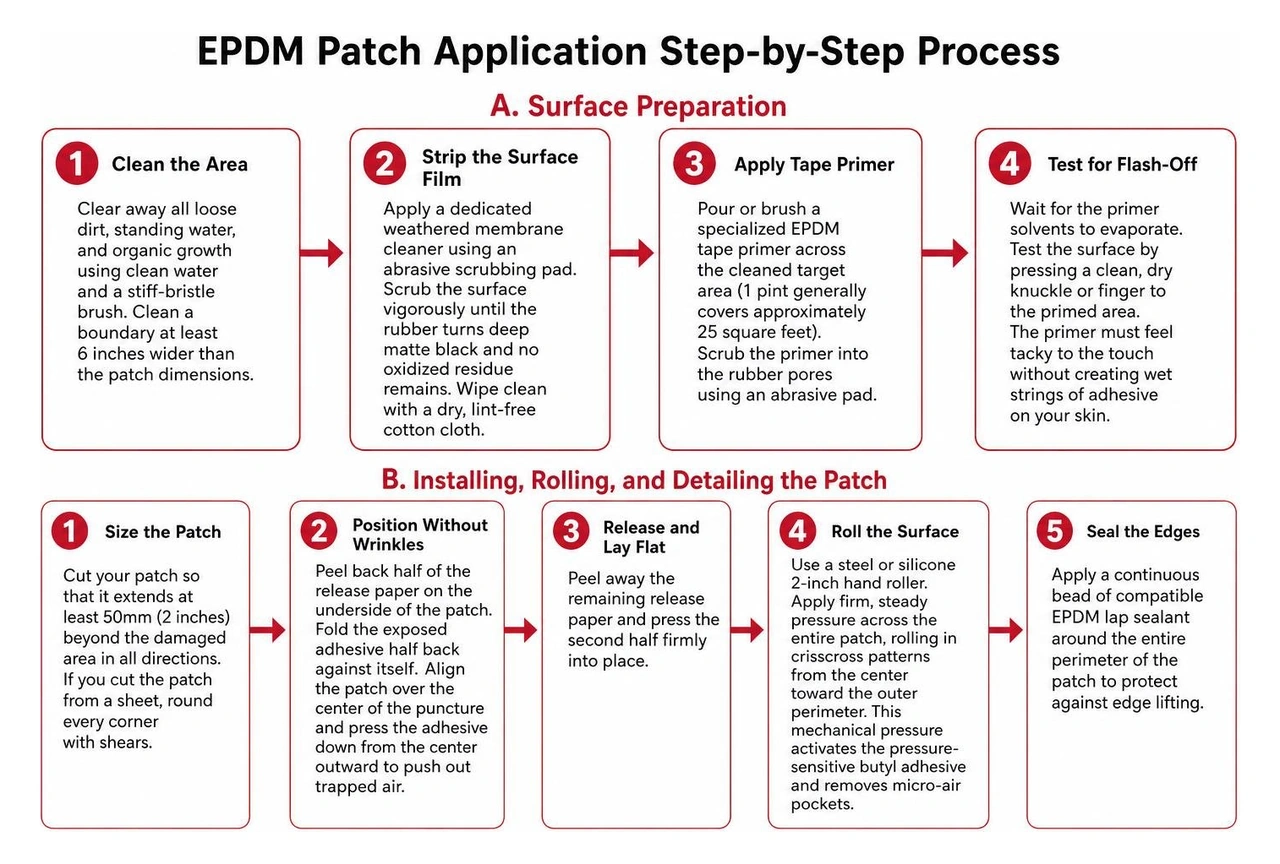
- Size the Patch: Cut your patch so that it extends at least 50mm (2 inches) beyond the damaged area in all directions. If you cut the patch from a sheet, round every corner with shears.
- Position Without Wrinkles: Peel back half of the release paper on the underside of the patch. Fold the exposed adhesive half back against itself. Align the patch over the center of the puncture and press the adhesive down from the center outward to push out trapped air.
- Release and Lay Flat: Peel away the remaining release paper and press the second half firmly into place.
- Roll the Surface: Use a steel or silicone 2-inch hand roller. Apply firm, steady pressure across the entire patch, rolling in crisscross patterns from the center toward the outer perimeter. This mechanical pressure activates the pressure-sensitive butyl adhesive and removes micro-air pockets.
- Seal the Edges: Apply a continuous bead of compatible EPDM lap sealant around the entire perimeter of the patch to protect against edge lifting.
Practicing consistent house rubber roof maintenance through biannual visual checks keeps these repaired areas watertight for the remaining life of the roof.
Common Repair Mistakes and Incompatible Materials to Avoid
Most failed flat roof repairs are caused by chemical incompatibility or poor environmental conditions during installation.
Destructive Sealants and Incompatible Adhesives
- Asphalt Roofing Cement: Never apply standard black roofing tar, plastic cement, or asphalt-based mastics to an EPDM roof. Petroleum oils in asphalt chemically attack the synthetic rubber polymer, causing the membrane to soften, swell, bubble, and disintegrate.
- Standard Hardware-Store Silicone: Standard unprimed silicone caulk cannot bond securely to smooth rubber. It shrinks, loses flexibility under temperature shifts, and pulls free after a single freeze-thaw cycle.
- Petroleum Distillates and Solvents: Exposure to lubricating greases, motor oils, vegetable oils, and animal fats dissolves butyl adhesives and degrades EPDM sheets.
- Duct Tape and General Construction Tapes: These adhesives break down rapidly under ultraviolet sunlight and lack water-submersion resistance.
Environmental and Application Errors
- Cold-Weather Failures: EPDM primers and butyl adhesives lose their bonding capabilities in cold weather. Installation temperatures must remain at or above 40 degrees Fahrenheit (5 degrees Celsius) for at least 48 hours to ensure a full bond.
- Trapped Substrate Moisture: Applying a patch over damp rubber traps moisture inside the roofing system, causing the adhesive to lift while rotting the insulation beneath.
- Direct Midday Sun: Applying liquid coatings in extreme direct heat causes premature surface skinning, which traps unevaporated solvents underneath and leads to blistering.
- Ignoring Chronic Ponding: If low points on your roof hold standing water due to improper slope, a standard patch may eventually lift. Liquid waterproofing systems require a minimum finished fall of 1:80 to remain fully watertight over years of service.
When to DIY vs Hiring a Professional for Flat Roof Repair
Handling a simple puncture yourself can save time, but larger membrane failures require commercial-grade equipment and structural assessment.
Before climbing a ladder, determine whether a targeted patch will solve the core issue, or if you need professional rubber flat roof repair to address deeper assembly problems.
Feasibility Criteria for DIY Patching
A DIY repair is suitable when:
- The damage is an isolated puncture, nail pop, or small cut under 8 inches in length.
- The surrounding rubber membrane remains pliable, elastic, and firmly adhered to the roof deck.
- The timber decking below feels completely firm and solid underfoot.
- The repair area is located on an open flat section, away from complicated drainage sumps, scuppers, or edge terminations.
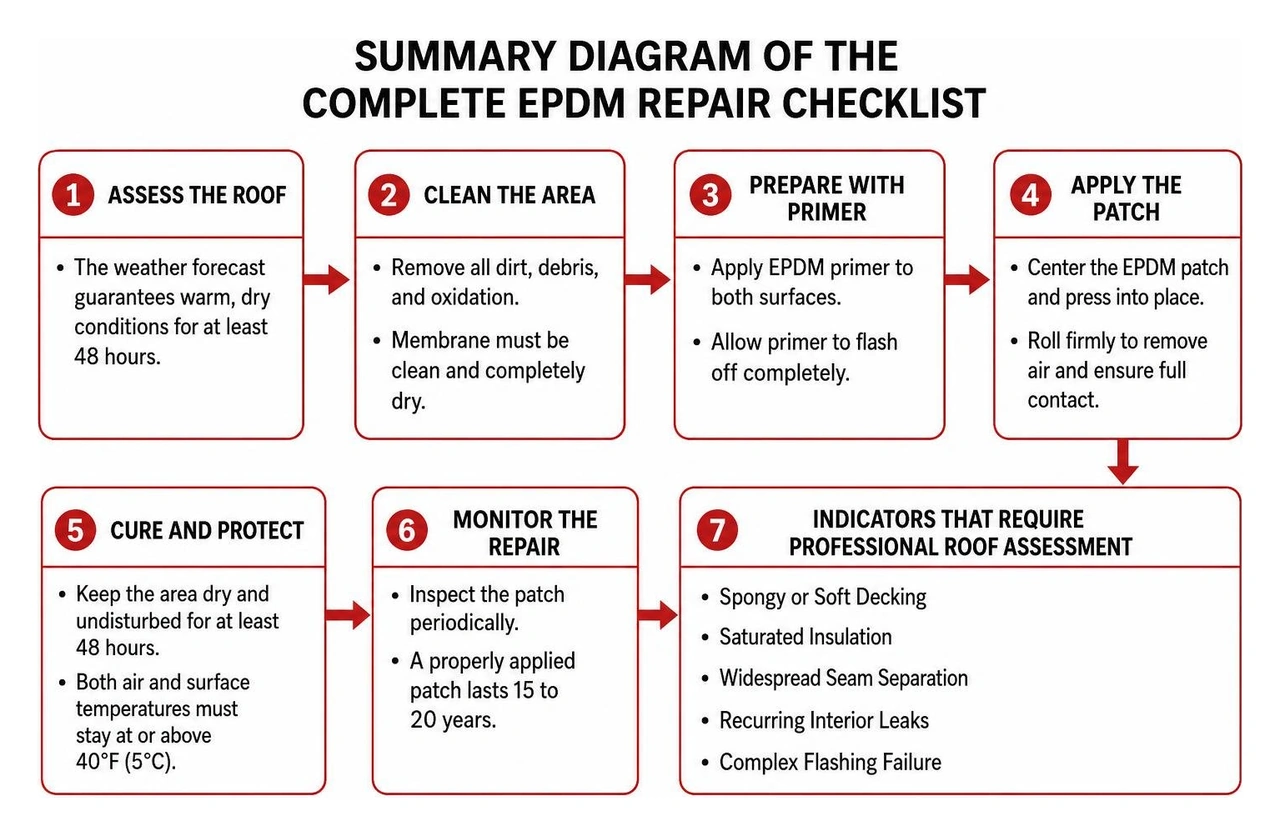
- The weather forecast guarantees warm, dry conditions for at least 48 hours.
Indicators That Require Professional Roof Assessment
Call a trusted roofing contractor immediately if you notice:
- Spongy or Soft Decking: Stepping near the leak feels springy or sunken, indicating that water has rotted the plywood or OSB structure underneath.
- Saturated Insulation: The membrane feels like a waterbed due to gallons of water trapped inside the polyiso insulation layer.
- Widespread Seam Separation: Multiple field seams are pulling apart across large sections of the roof, pointing to adhesive age exhaustion or structural movement.
- Recurring Interior Leaks: Water reappears inside your home or commercial building despite multiple patch attempts in the same area.
- Complex Flashing Failure: Leaks originating behind parapet wall metal, around commercial HVAC units, or through roof drains require tailored sheet metal work and custom membrane boots.
Frequently Asked Questions About EPDM Patch Repairs
How long does a properly applied EPDM patch last?
When the membrane is thoroughly cleaned, primed, and rolled, a cured EPDM patch forms a permanent vulcanized bond. The patch will withstand harsh UV exposure, freeze-thaw cycles, and heavy rain for 15 to 20 years, often outlasting the surrounding roof.
What temperature and weather conditions are required for patching?
Both ambient air and roof surface temperatures must remain at or above 40 degrees Fahrenheit (5 degrees Celsius) during application and for at least 48 hours afterward. Avoid working in rain, high humidity, or heavy fog, as any surface moisture interferes with primer tack and adhesive performance.
Can an EPDM rubber roof leak be repaired from inside the building?
No. Trying to seal a leak from the interior ceiling traps water inside the insulation boards, joists, and decking. This accelerates structural wood rot and promotes hazardous mold growth while the water continues to deteriorate the roof assembly. All flat roof repairs must be performed from the top exterior membrane.
Dependable Flat Roof Care in Central Ohio
Selecting the correct patch material, scrubbing away surface oxidation, allowing your primer to flash off completely, and rolling every seam with firm pressure ensures your rubber roof remains watertight across decades of Midwest seasons.
When you need an experienced eye to inspect persistent leaks or evaluate the overall health of your membrane, review our guide to the best flat roof patch techniques or reach out to our team.
At JF Baker Roofing, we have been serving Central Ohio since 1929. The company is led by third-generation owners Chad and Pat Baker. We are a CertainTeed ShingleMaster Preferred Contractor, NRCA member, and BBB Accredited Business with an A+ rating. We serve both residential and commercial clients across Columbus and surrounding areas including Dublin, Upper Arlington, Hilliard, Grandview Heights, Worthington, and Westerville.
We provide residential roofing, commercial roofing, roof repair, roof replacement, storm damage roofing, gutter installation and repair, and sheet metal work, with honest assessments, transparent pricing, and no high-pressure sales tactics. Built on integrity. Proven by performance. If you have questions about your flat roof or suspect hidden moisture damage, contact us today for an honest assessment and straightforward guidance.