Roof and Flashing Caulk: How to Seal Metal, Shingles, and Vents Properly
Choosing the Right Roof and Flashing Caulk
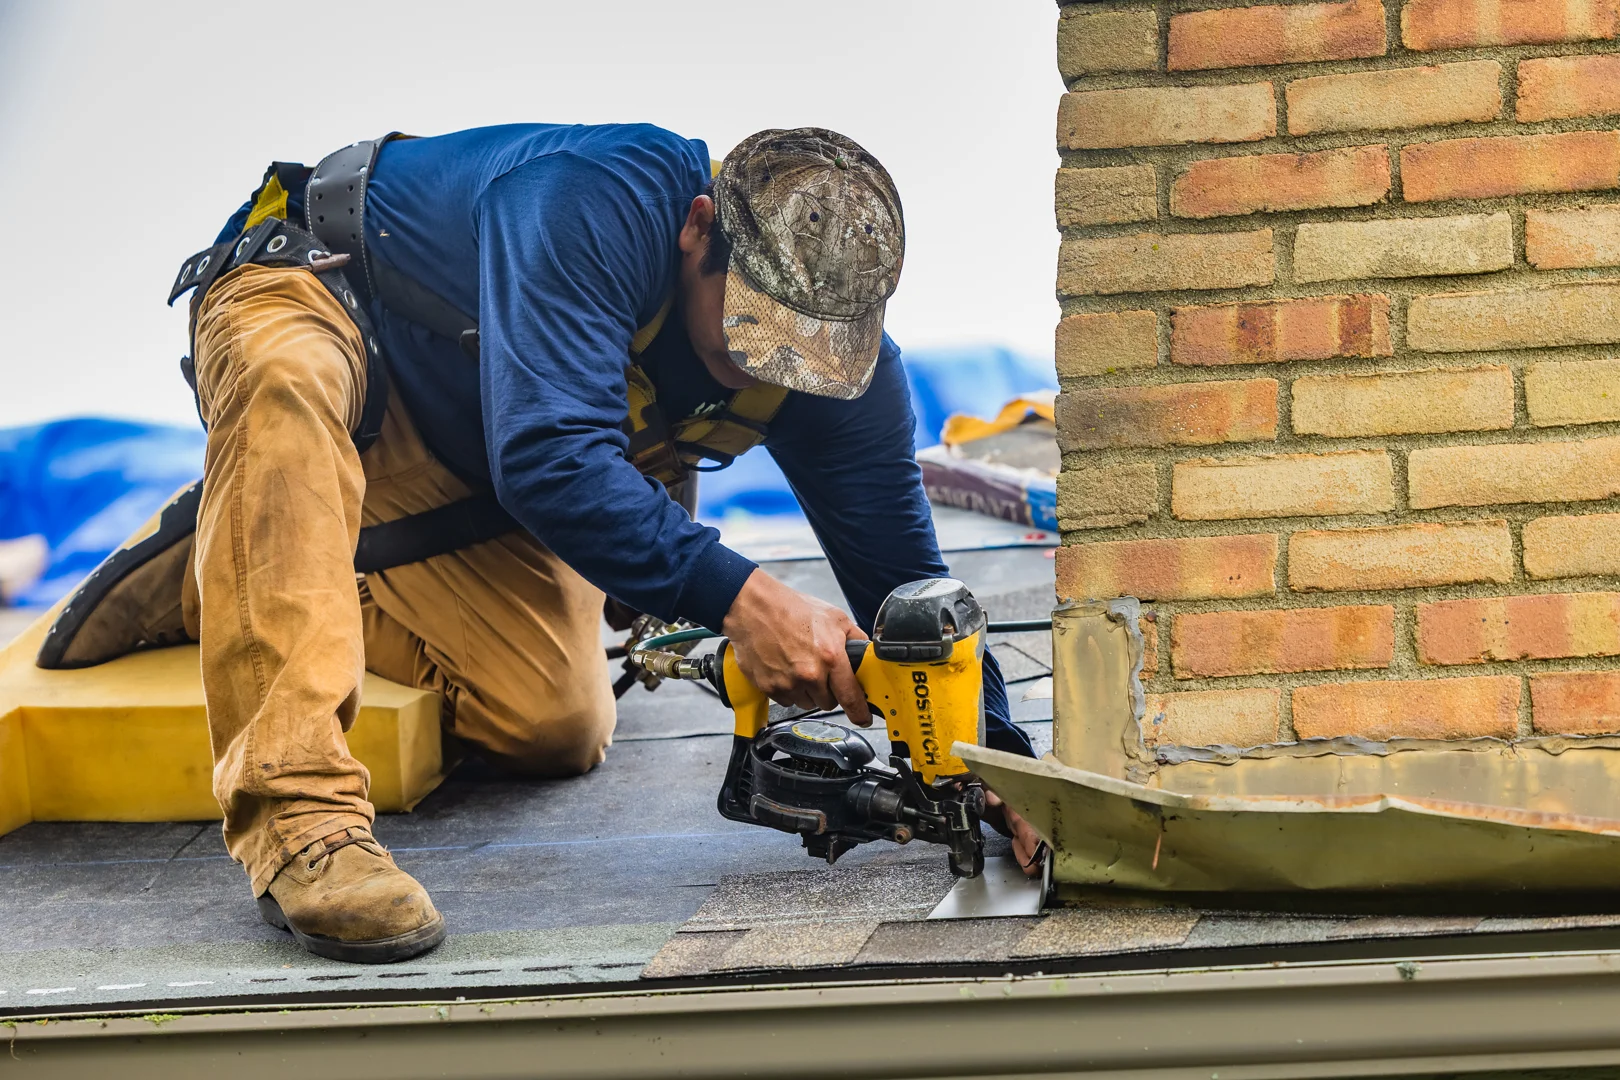
Choose roof and flashing caulk by the materials it must bond to and how much the joint moves. For metal flashing and vents, use a flexible exterior sealant approved for both surfaces. For asphalt shingles, check that the product is labeled for asphalt. EPDM and TPO roofs need a sealant approved for the specific membrane. Clean and dry the joint first unless the product expressly allows damp application.
Caulk can seal a small gap, but it will not fix loose flashing or damaged roofing. That matters after a Columbus storm, when a leak may need more than a new bead of sealant.
I'm Chad M. Baker of JF Baker Roofing, and I'll explain how to tell which repair your roof needs.
Roof and flashing caulk further reading:
Types of Roof and Flashing Caulk and How They Compare
Selecting the right sealant requires understanding how different chemical formulations perform on an active roof. Every roof expands and contracts as the seasons change across Central Ohio. The materials securing your penetrations must maintain adhesion under intense summer heat, driving rain, and winter freeze-thaw cycles. Using standard painter caulk or interior-grade silicone will quickly lead to cracking, shrinking, and water intrusion.
Roofing sealants fall into four primary categories: polyurethane, silicone, hybrid polymers (such as polyethers or MS polymers), and SBS-modified bitumens. Each formulation handles movement, sun exposure, and surface moisture differently.
Polyurethane, Silicone, Hybrid Polymers, and SBS Bitumen
Polyurethane is one of the most reliable workhorses in modern roofing. A high-grade polyurethane roof sealant creates a strong, flexible bond that adheres aggressively to masonry, metal, asphalt, and wood. Products such as Loctite PL Roof and Flashing Polyurethane Sealant or commercial-grade Sonolastic NP1 offer high tensile strength and tear resistance. Polyurethane provides exceptional shear strength and remains flexible in service temperatures ranging from -40 degrees Fahrenheit to 180 degrees Fahrenheit. It is fully paintable once cured, making it ideal for visible exterior flashings. Most polyurethanes provide a service life of 10 to 15 years, though they generally require completely dry surfaces during installation. Detailed technical data on polyurethane sealants demonstrates their high elongation ratings and dependable adhesion on mortar and metal.
Silicone roof sealants offer superior ultraviolet resistance and thermal stability. A high-quality silicone roof flashing sealant can last 20 years or more without drying out, shrinking, or becoming brittle under direct sun exposure. Premium silicone products, like Kool Seal Rubberized Silicone, become tack-free in roughly 30 minutes and fully cure within 24 hours. The main drawback of silicone is that standard exterior paints will not stick to it. Once you apply silicone to a metal joint or shingle detail, future sealants will not bond over it unless every trace of the old silicone is completely removed.
Hybrid polymers combine the best characteristics of polyurethane and silicone. Formulations like OSI Quad Max provide outstanding movement capability, cure rapidly in varying weather, and remain paintable. These hybrid sealants bond reliably to damp substrates and resist dust collection during the initial cure window.
SBS-modified bitumen caulks, such as CertainTeed FlintBond, blend synthetic rubber with refined asphalt. These sealants match asphalt shingles and modified bitumen low-slope systems perfectly. They maintain flexibility in cold temperatures and excel at sealing shingle tabs, metal edge laps, and flashing seams without becoming brittle. Synthetic rubber and neoprene options, like APOC 501 Super-Flash, offer extreme chemical longevity and the unique ability to seal joints even in standing water during emergency repairs.
Joint Movement Capability and ASTM Classifications
Understanding industry standards helps you choose a product that will not rip apart when materials expand. The standard test method for elastomeric joint sealants is ASTM C920. This rating system classifies sealants by their ability to handle joint movement without losing adhesion or tearing:
- Class 25: Accommodates plus or minus 25 percent joint expansion and contraction. Standard for basic exterior trim and static joints.
- Class 35: Accommodates plus or minus 35 percent joint movement. Products like Loctite PL and Sonolastic NP1 handle the higher thermal movement of metal-to-masonry transitions.
- Class 50: Accommodates plus or minus 50 percent joint movement. Premium hybrid polymers provide this level of flexibility, making them ideal for wide metal laps, high-expansion flashings, and multi-story transitions.
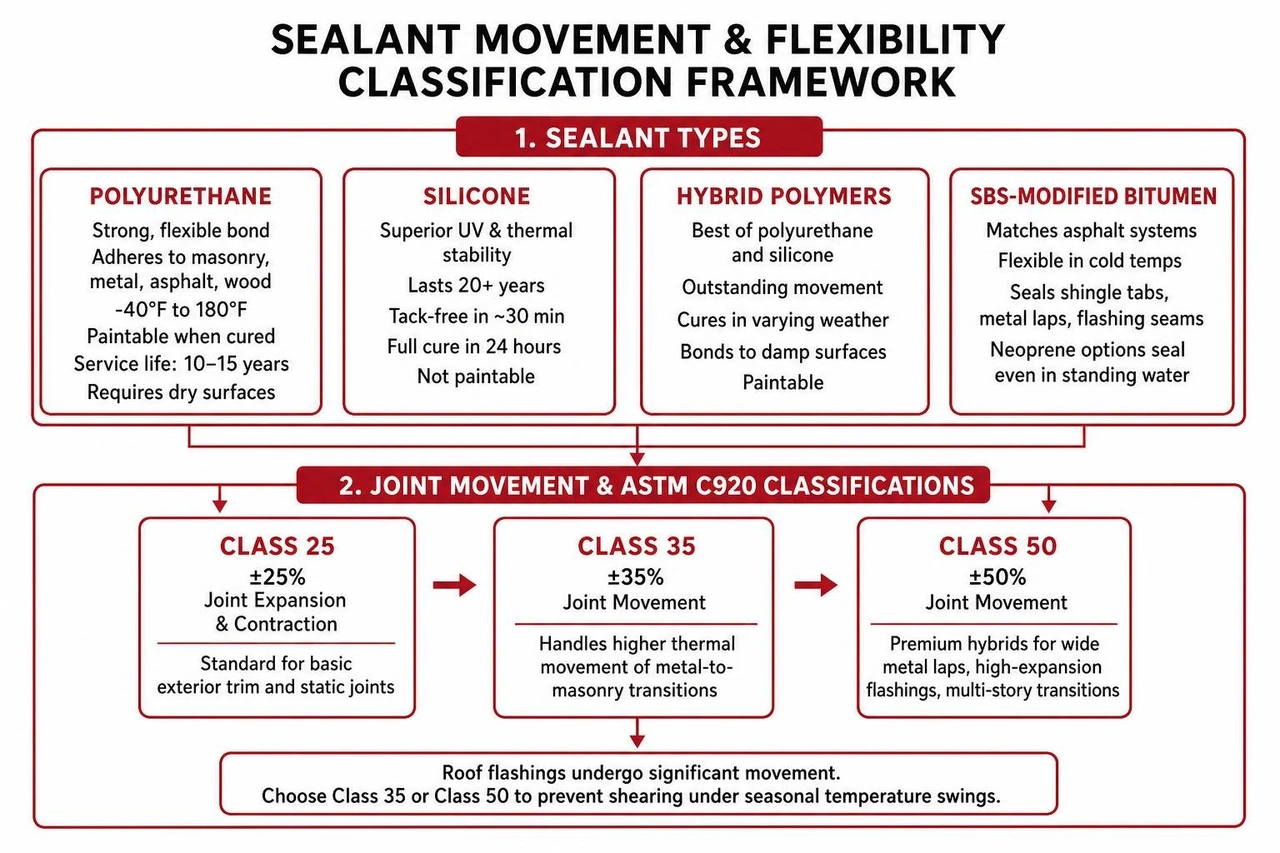
Roof flashings undergo significant movement. For example, a dark aluminum counter-flashing installed against a light-colored brick chimney expands at a very different rate than the masonry behind it. Choosing a Class 35 or Class 50 sealant prevents the bead from shearing under seasonal temperature swings.
Matching Sealants to Specific Roofing Materials and Details
Different roofing materials have distinct chemical and physical requirements. Applying the wrong sealant can cause chemical incompatibility, shingle blistering, or total adhesion failure.
Substrate Compatibility for Roof and Flashing Caulk
- Asphalt Shingles and Valleys: For shingle tabs, nail head sealing, and valley intersections, use SBS-modified bitumen mastic or high-grade polyurethane. Avoid basic solvent-heavy mastics on exposed shingle faces, as excess solvent can cause the asphalt mat to blister.
- Chimney and Counter-Flashing: Sealing the reglet joint where metal enters brick requires a product with high masonry adhesion and movement capacity. Follow the techniques outlined in our chimney flashing leak repair guide, using a non-sag Class 35 polyurethane.
- Roof Penetrations and Vent Boots: Pipe flashings undergo movement from interior plumbing expansion and exterior wind. When sealing a roof pipe flashing, use a premium hybrid polymer or polyurethane around the base flange and rubber collar.
- Metal Roofing and Drip Edges: Sheet metal expands significantly. Refer to our metal flashing sealant guide for details on sealing standing seams, ridge caps, and perimeter drip edges using non-corrosive hybrid polyethers or neutral-cure silicone.
- Single-Ply Membranes (EPDM and TPO): Commercial single-ply membranes require dedicated primers and sealants. Standard asphalt caulks will degrade EPDM rubber and TPO membranes, causing rapid material breakdown. Always verify membrane manufacturer compatibility.
Emergency Wet-Surface vs. Dry-Weather Formulations
Standard polyurethanes and silicones require dry substrates. If trapped water is present in the joint, moisture can prevent the sealant from contacting the substrate, causing the bead to lift and fail.
During active leaks or rainy weather, use specialized emergency formulations:
- Tripolymer Sealants (like Geocel 2300): Can be applied in temperatures ranging from 0 degrees Fahrenheit to 140 degrees Fahrenheit, even on damp surfaces.
- SBS-Modified Bitumen Mastics: Engineered under standards like ASTM D3019 Type III, these compounds displace water to seal leaks directly on damp modified bitumen and asphalt roofs. The SBS-modified bitumen specifications outline how these products bond through moisture films.
- Neoprene and Rubberized Sealants: Designed to adhere underwater for temporary, emergency leak mitigation until permanent dry-weather repairs can be made.
Distinguishing Caulk from Roof Mastic and Coatings
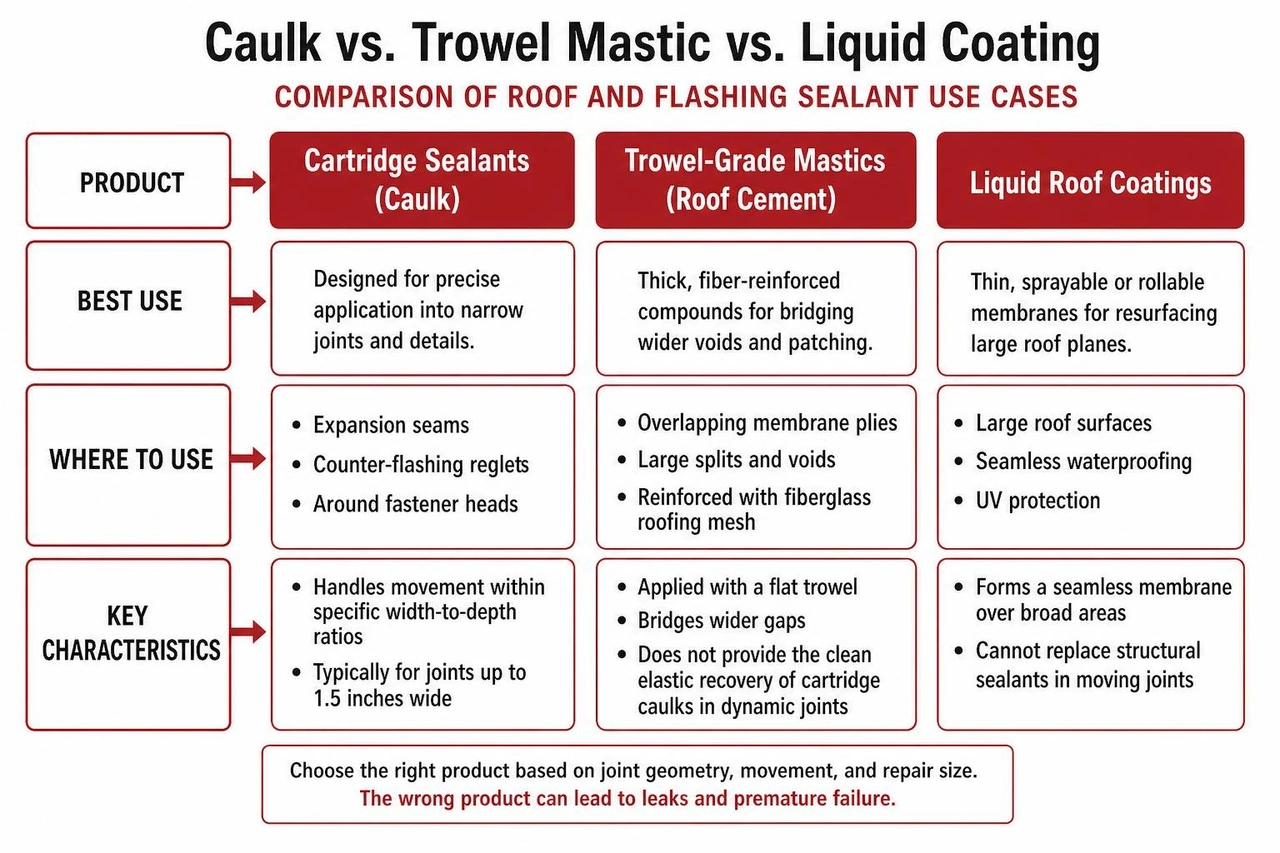
Homeowners often confuse roofing caulk with roof cement, trowel-grade mastics, and elastomeric roof coatings. Each product serves a distinct purpose based on joint geometry and repair size.
When to Use Cartridge Sealants vs. Trowel Mastics
- Cartridge Sealants (Caulk): Designed for precise application into narrow joints, expansion seams, counter-flashing reglets, and around fastener heads. Cartridge sealants handle joint movement within specific width-to-depth ratios (typically joints up to 1.5 inches wide).
- Trowel-Grade Mastics (Roof Cement): Thick, fiber-reinforced asphalt or synthetic compounds applied with a flat trowel. Mastics bridge wider voids, secure overlapping membrane plies, and patch large splits when reinforced with fiberglass roofing mesh. They do not provide the clean elastic recovery of cartridge caulks in dynamic metal joints.
- Liquid Roof Coatings: Thin, sprayable or rollable elastomeric membranes used to resurface large roof planes. Coatings provide UV protection and seamless waterproofing over broad surfaces, but they cannot replace structural sealants in moving joints.
Step-by-Step Preparation and Application Best Practices
A sealant joint is only as durable as the surface beneath it. Even the most advanced Class 50 hybrid caulk will fail if applied over dirt, rust, or failing caulk.
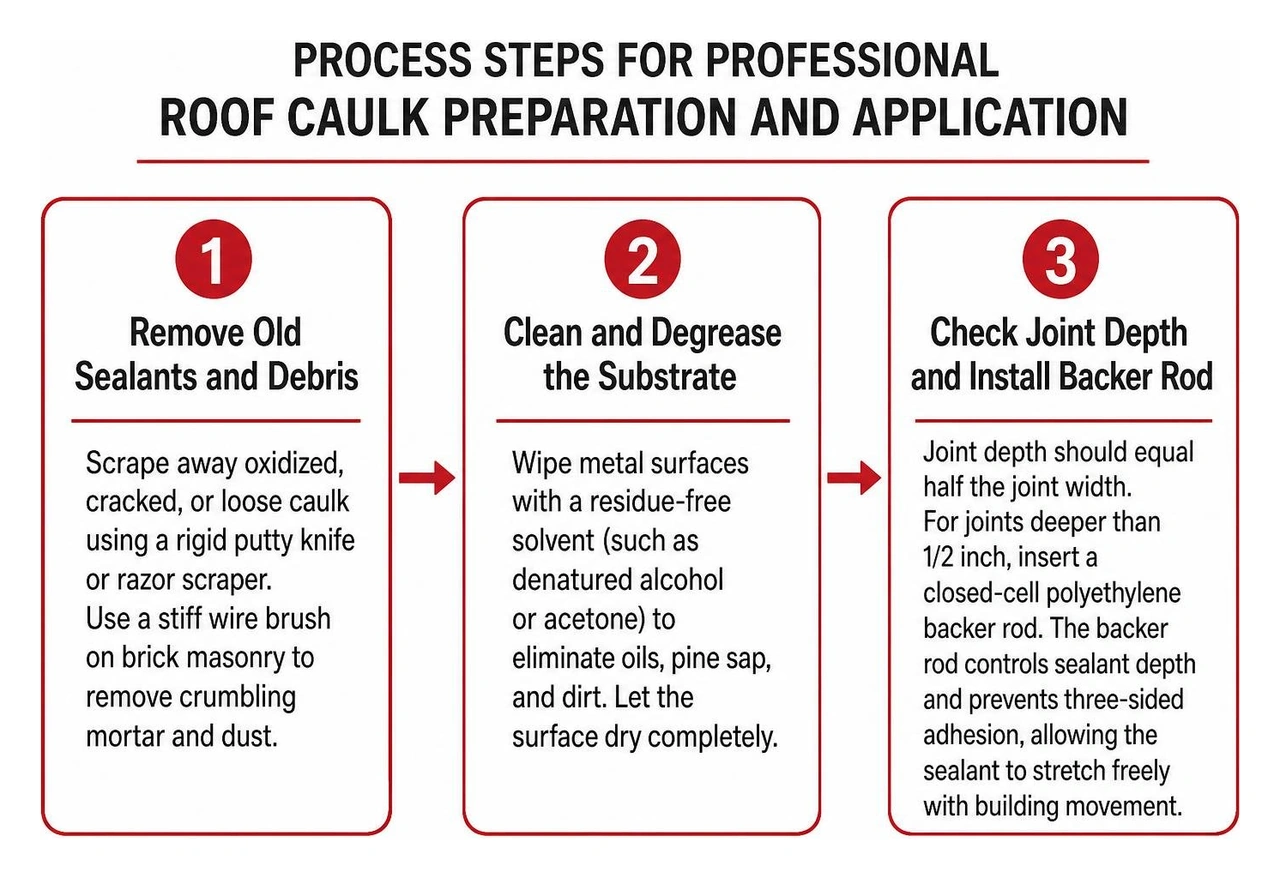
How to Apply Roof and Flashing Caulk for a Long-Lasting Seal
- Remove Old Sealants and Debris: Scrape away oxidized, cracked, or loose caulk using a rigid putty knife or razor scraper. Use a stiff wire brush on brick masonry to remove crumbling mortar and dust.
- Clean and Degrease the Substrate: Wipe metal surfaces with a residue-free solvent (such as denatured alcohol or acetone) to eliminate oils, pine sap, and dirt. Let the surface dry completely.
- Check Joint Depth and Install Backer Rod: Joint depth should equal half the joint width. For joints deeper than 1/2 inch, insert a closed-cell polyethylene backer rod. The backer rod controls sealant depth and prevents three-sided adhesion, allowing the sealant to stretch freely with building movement.
- Cut the Cartridge Tip at a 45-Degree Angle: Size the nozzle opening to match your target joint width (typically 1/4 inch to 3/8 inch). Puncture the inner foil seal thoroughly.
- Apply Continuous, Uniform Pressure: Hold the caulking gun at a 45-degree angle, pushing the bead into the joint rather than dragging it over the top. Pushing forces the sealant against both sidewalls to ensure complete surface wetting.
- Tool the Bead Immediately: Within 5 minutes of application, use a rounded caulking spatula or gloved finger to tool the bead slightly concave. Tooling eliminates internal air pockets, smooths the surface for water shedding, and creates uniform contact along the joint edges.
Priming, Tooling, and Cure Times
Most modern polyurethane and hybrid sealants do not require primers on clean aluminum, factory-finished metals, or dry brick. However, bare galvanized steel, oxidized copper, and porous concrete may require a manufacturer-recommended bonding primer to prevent adhesion failure.
Environmental conditions dictate cure times. At 78 degrees Fahrenheit and 50 percent relative humidity:
- Skin Time: Most polyurethanes form a protective skin in 30 to 60 minutes.
- Initial Functional Cure: The bead achieves functional rain resistance within 24 hours.
- Full Cure: Complete structural cure and full tensile strength develop within 7 days.
Cold temperatures and low humidity extend cure times significantly. Plan exterior sealing projects during stable, dry weather windows whenever possible.
Frequently Asked Questions About Roof Sealants
How long does roof caulk last before needing reapplication?
High-grade polyurethane and hybrid polymer sealants generally last between 10 and 15 years on residential roofs, while high-performance silicones can last up to 20 years. However, high sun exposure, heavy tree shade, and frequent freeze-thaw cycles can cause sealants to break down more quickly. Checking your penetrations as part of routine roof maintenance helps you spot minor shrinkage, surface cracks, or edge peeling before water enters the living spaces below.
Can you paint over roof and flashing sealant?
Polyurethane sealants, hybrid polyethers, and SBS-modified caulks are fully paintable after they achieve full cure (typically 3 to 7 days). Use a premium exterior acrylic latex paint to match surrounding trim, siding, or masonry. Standard 100 percent silicone sealants cannot be painted, as paint will bead up and peel off the surface.
Do you need a primer on metal flashing before caulking?
Standard painted aluminum and factory Kynar-finished metal flashings usually do not require a primer when using quality polyurethanes or hybrid sealants. However, bare galvanized metal, unwashed copper, and highly weathered lead require thorough degreasing and light abrasion. In some instances, a dedicated metal primer ensures long-term adhesion under heavy thermal stress.
Maintaining Watertight Flashing and Roof Joints
Proper caulking is a critical detail in any roofing system, but it cannot compensate for rusted metal, improperly layered base flashings, or structural deterioration. When penetrations begin leaking, an experienced eye is required to determine whether a joint needs recaulking or a complete metal flashing replacement.
JF Baker Roofing has served Central Ohio since 1929. The company is led by third-generation owners Chad and Pat Baker, carrying forward nearly a century of family-owned craftsmanship. As an NRCA member, CertainTeed ShingleMaster Preferred Contractor, and BBB Accredited Business with an A+ rating, our focus remains on doing what is right for your home.
We provide residential roofing, commercial roofing, roof repair, roof replacement, storm damage roofing, gutter installation and repair, and custom sheet metal work across Columbus and surrounding communities, including Dublin, Upper Arlington, Hilliard, Grandview Heights, Worthington, and Westerville.
Whether your home needs a focused flashing repair or a complete system assessment, our team provides honest assessments, clean job sites, transparent pricing, and no high-pressure sales tactics. We stand behind every roof we install.
To learn more about keeping your penetrations watertight, read our complete roof flashing sealant guide, or contact our team to schedule an inspection with a local professional.